
Create an Entra App for BC Integration
How to create an Entra App Registration in Azure

Creating an App Registration in Azure for Business Central
This post shows how to create an App Registration in Azure, allowing third-party systems to connect to Business Central (BC) APIs securely. It acts as an identity in BC and enables the use of OAuth 2.0 authentication protocols required by BC online.
A Few Key Concepts
Application Id (aka Client ID)
This is a unique identifier assigned to the app. It is registered in BC as the ‘identity’, and permissions are assigned to it, similar to a user’s permissions.
Tenant ID
The Azure tenant ID where the app is registered.
Redirect URI
This is where the authentication responses are sent:
BC Online
https://businesscentral.dynamics.com/OAuthLanding.htm
BC On Premise (some examples)
https://localhost/BC250/OAuthLanding.htmhttps://MyServer/BC250/OAuthLanding.htmhttps://{your server}/{your environment}/OAuthLanding.htm
Client Secret
The secret is generated and shared with the third-party system. It is used to prove identity when requesting an authentication token. These secrets are time-limited, and a new one must be generated and shared when the current one expires.
INFO
Client secrets are displayed only once, upon creation. If lost, a new one must be generated.
API Permissions
These define the API access an Entra app will have. They are configured in Azure and are unrelated to BC permissions. Examples include access to the Admin API in Business Central or Microsoft Graph API to read a user’s email address.
Delegated Permissions vs Application Permissions
When adding API permissions for Business Central, you must choose between Delegated and Application permissions. Generally, an app will need one or the other, depending on its specific purpose.
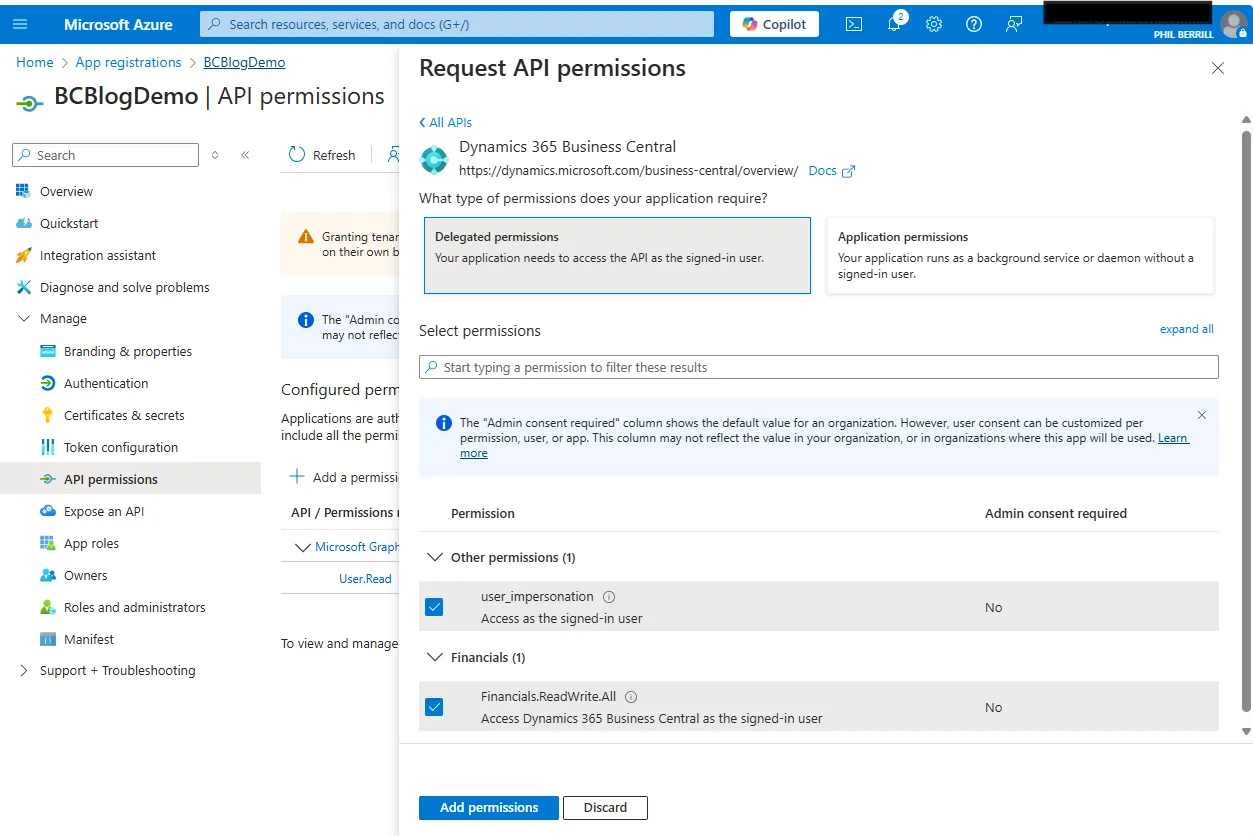
Delegated Permissions
Delegated permissions are used when the app acts on behalf of a signed-in user. These permissions require user authentication, meaning the user must log in. The app can only access Business Central based on that user’s permissions.
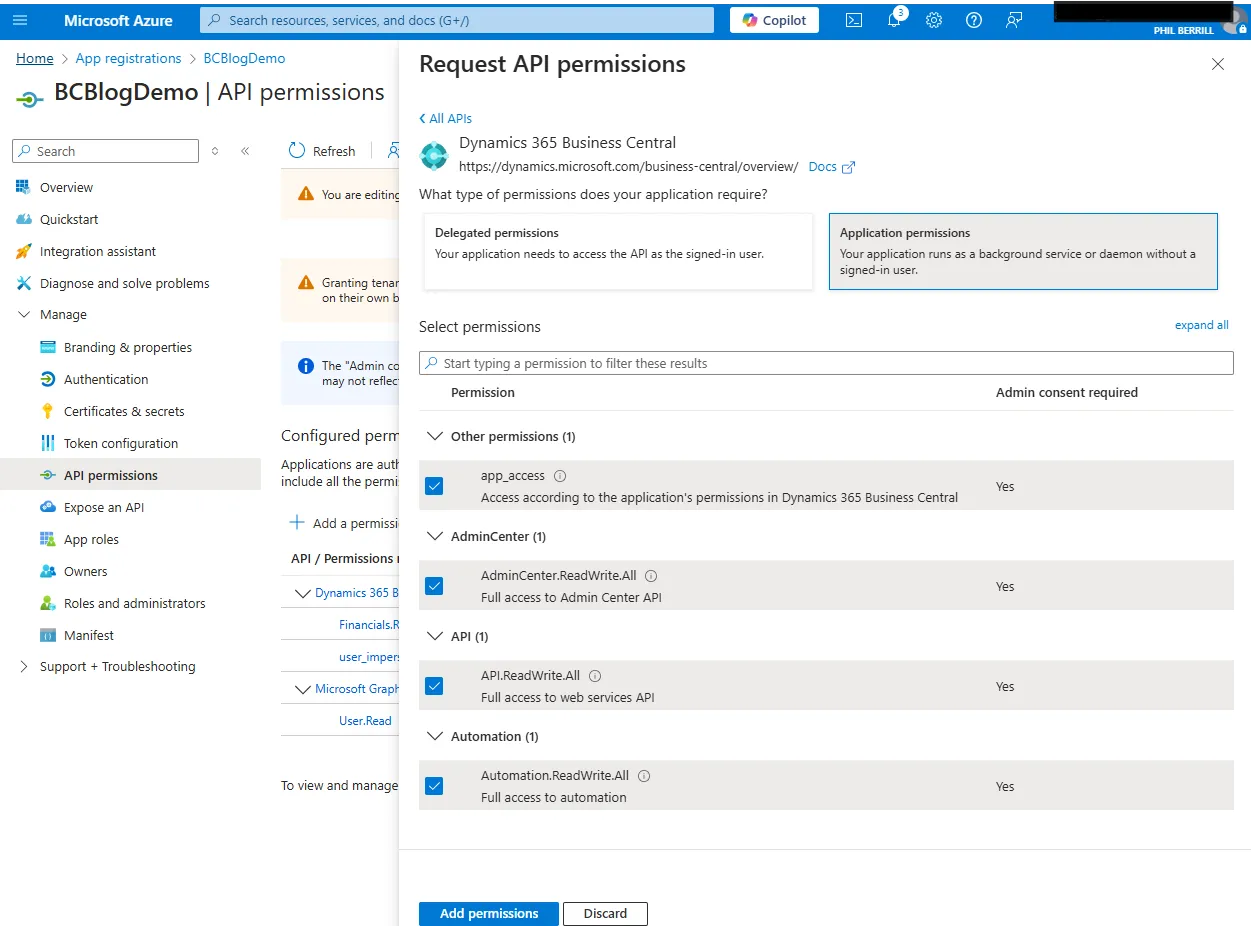
Application Permissions
Application permissions allow access to Business Central without a signed-in user. They are typically used for background services, automation, or system-to-system (S2S) integrations. The app receives full access based on assigned permissions.
Comparison Table
| Feature | Delegated Permissions | Application Permissions |
|---|---|---|
| User Sign-in Required? | ✅ Yes | ❌ No |
| Follows User Permissions? | ✅ Yes | ❌ No (App has its own BC permissions) |
| Best for? | Interactive user-based applications | Background processes, system-to-system integration |
| Example Use Case | Power Automate flow running as a user | Automated data sync between BC and another system |
| Authentication Type | OAuth 2.0 (User login required) | OAuth 2.0 Client Credentials (No user login) |
| Requires Admin Consent? | Sometimes | Always |
How to Register a New App for Business Central
Go to Azure Portal.
Navigate to Azure Active Directory → App registrations.
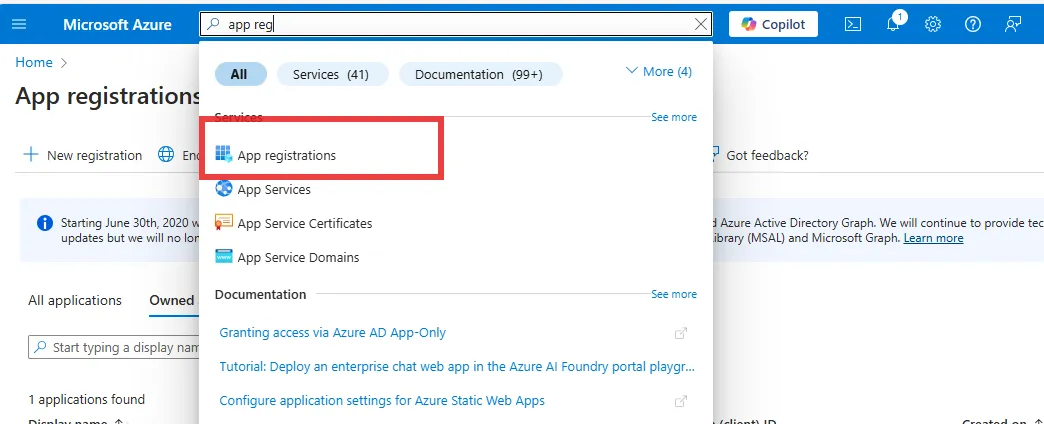
- Click + New registration. Give the app a name and choose the account type.
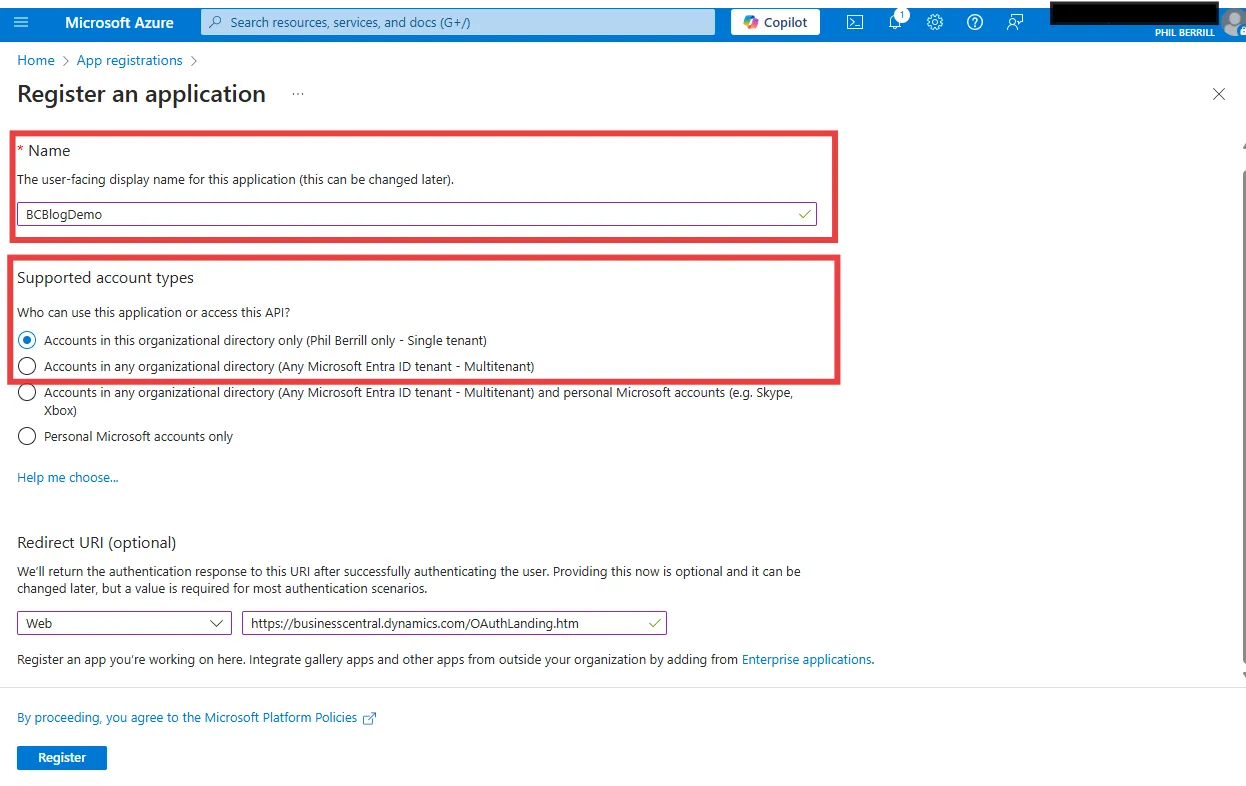
- Select Web (this can also be done later in Authentication settings).
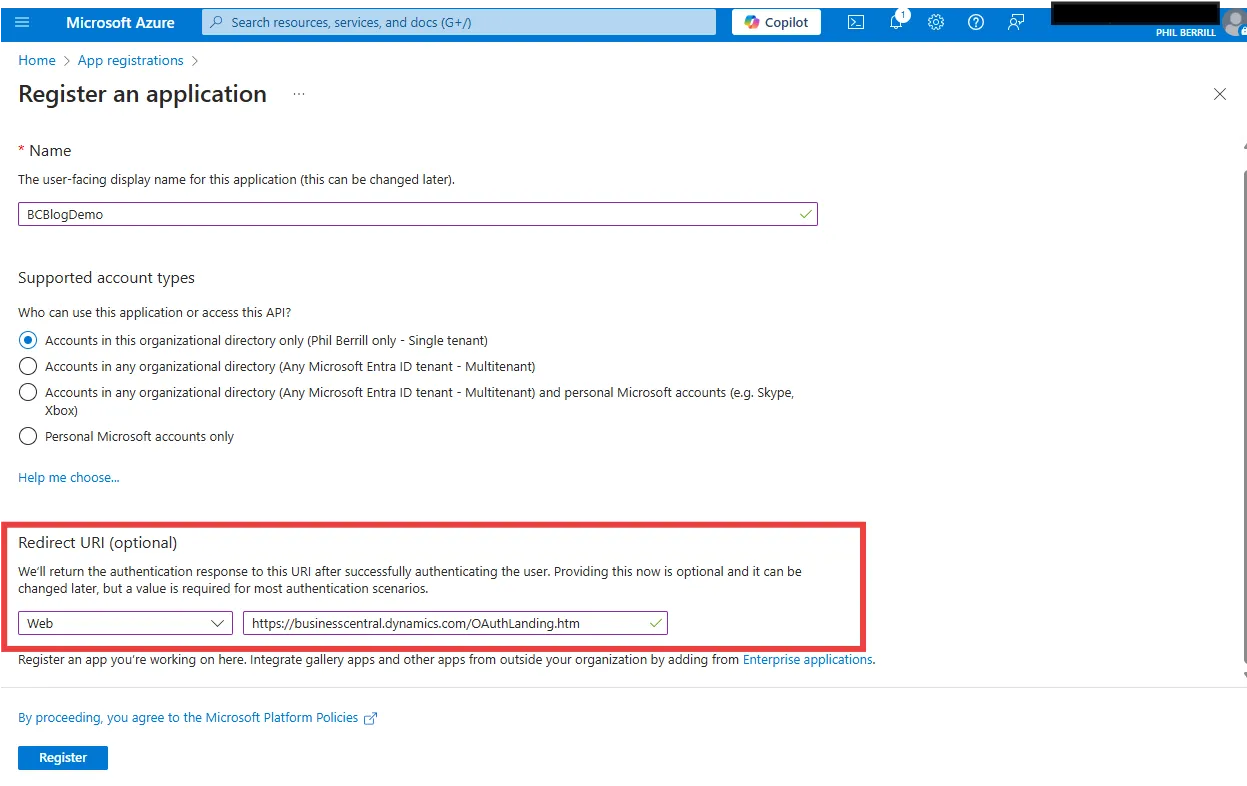
Enter the redirect URI:
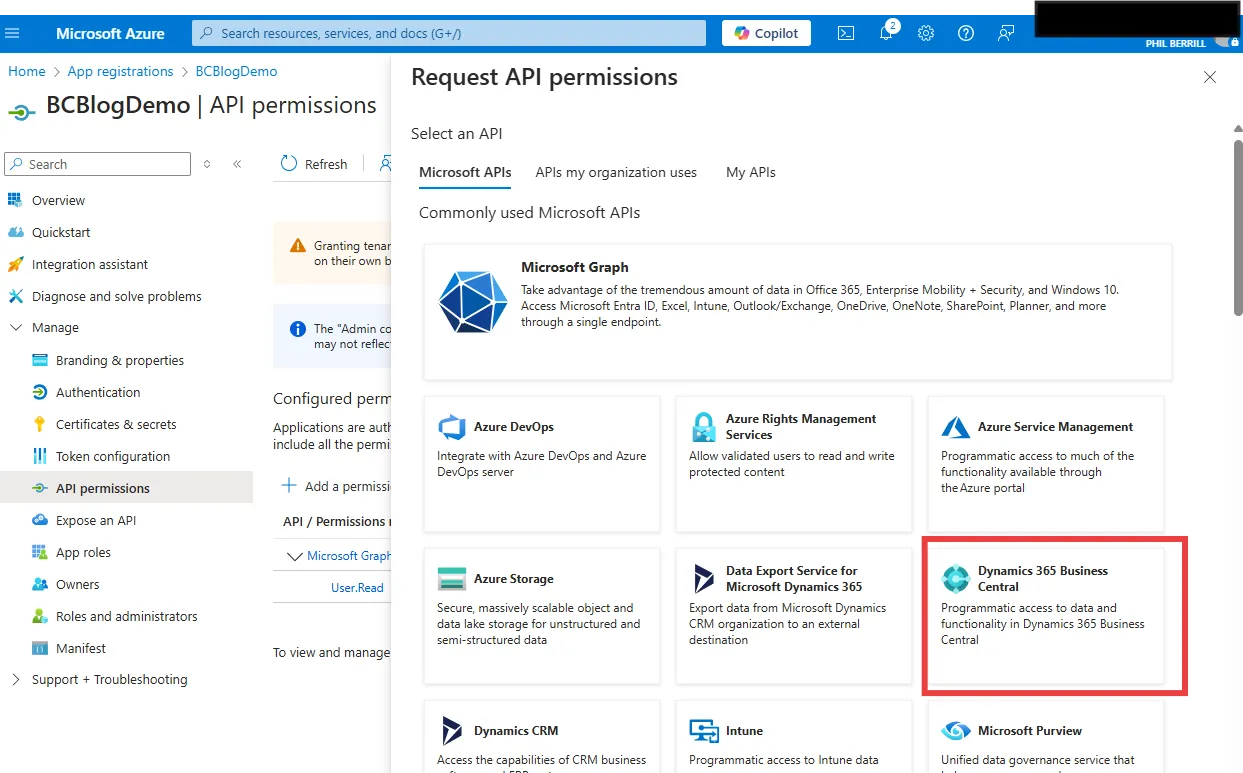
https://businesscentral.dynamics.com/OAuthLanding.htmClick Register to continue.Now we need to select the API permissions required for the app. Go to API Permissions and Add A Permission
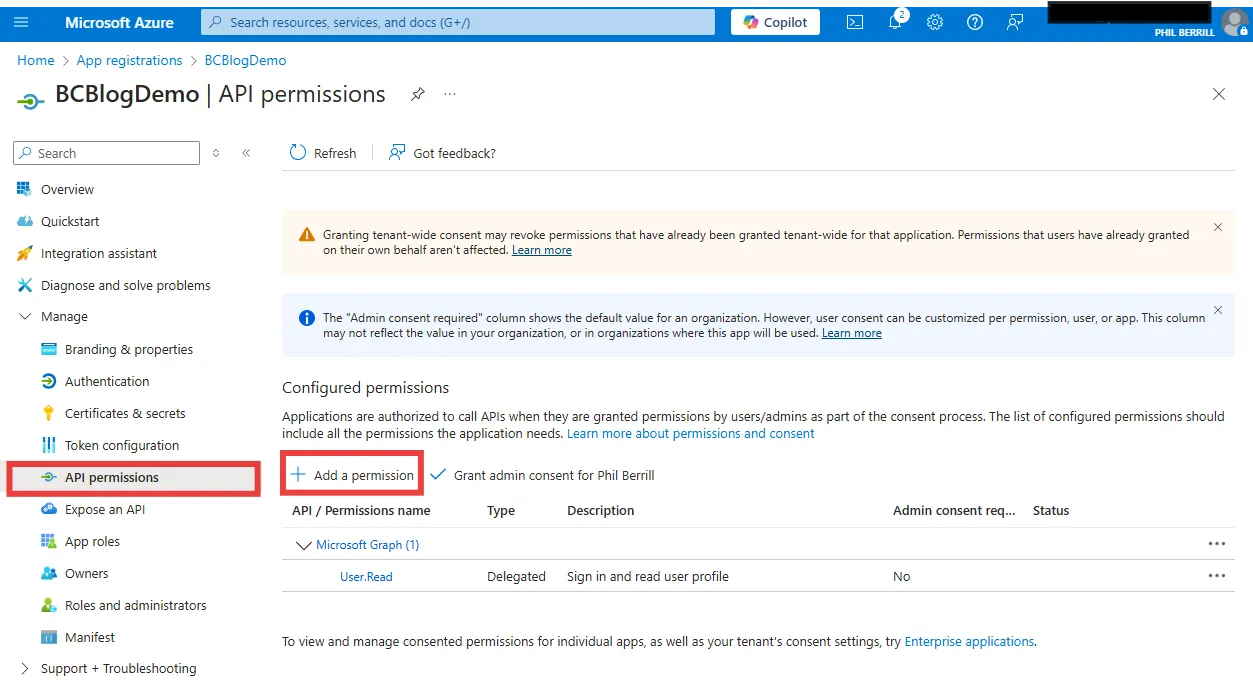
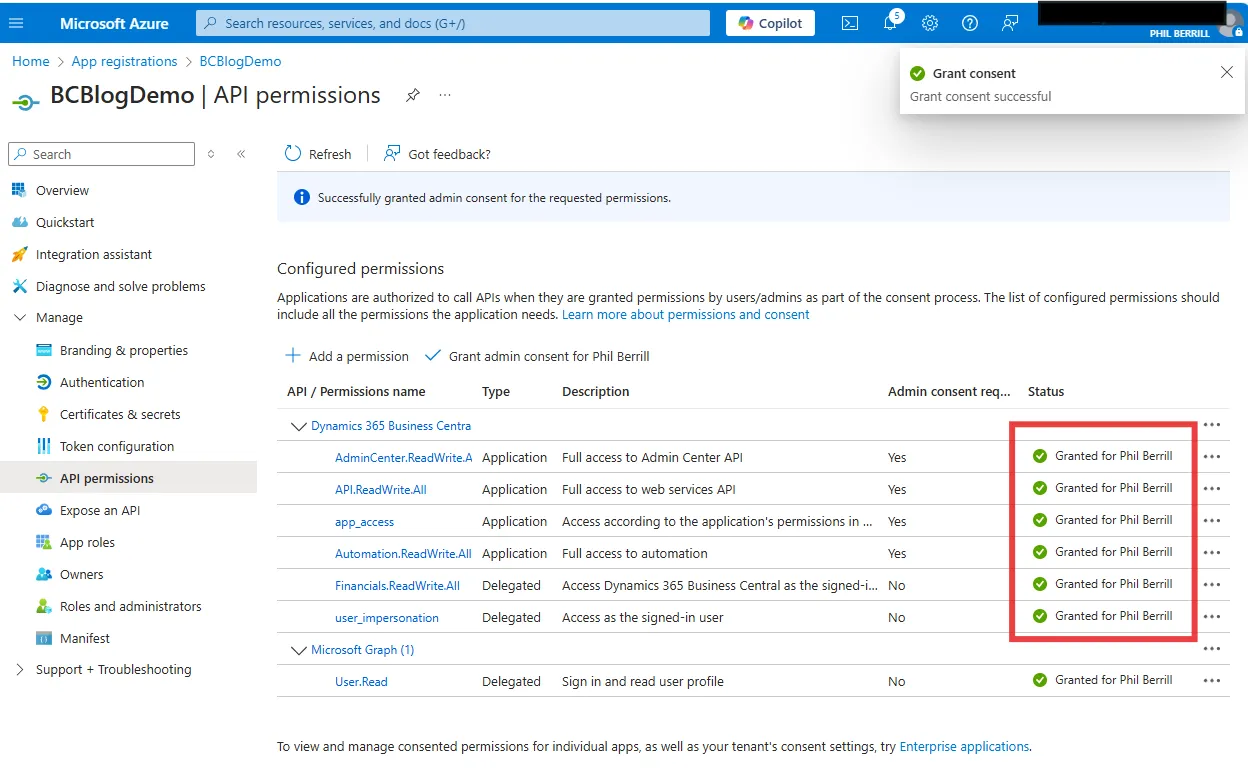
- From the options, select Dynamics 365 Business Central
- For Delegated Permissions, add the required permissions.
- For Application Permissions, select and choose the necessary permissions.
- If required, grant admin consent (admin access required).
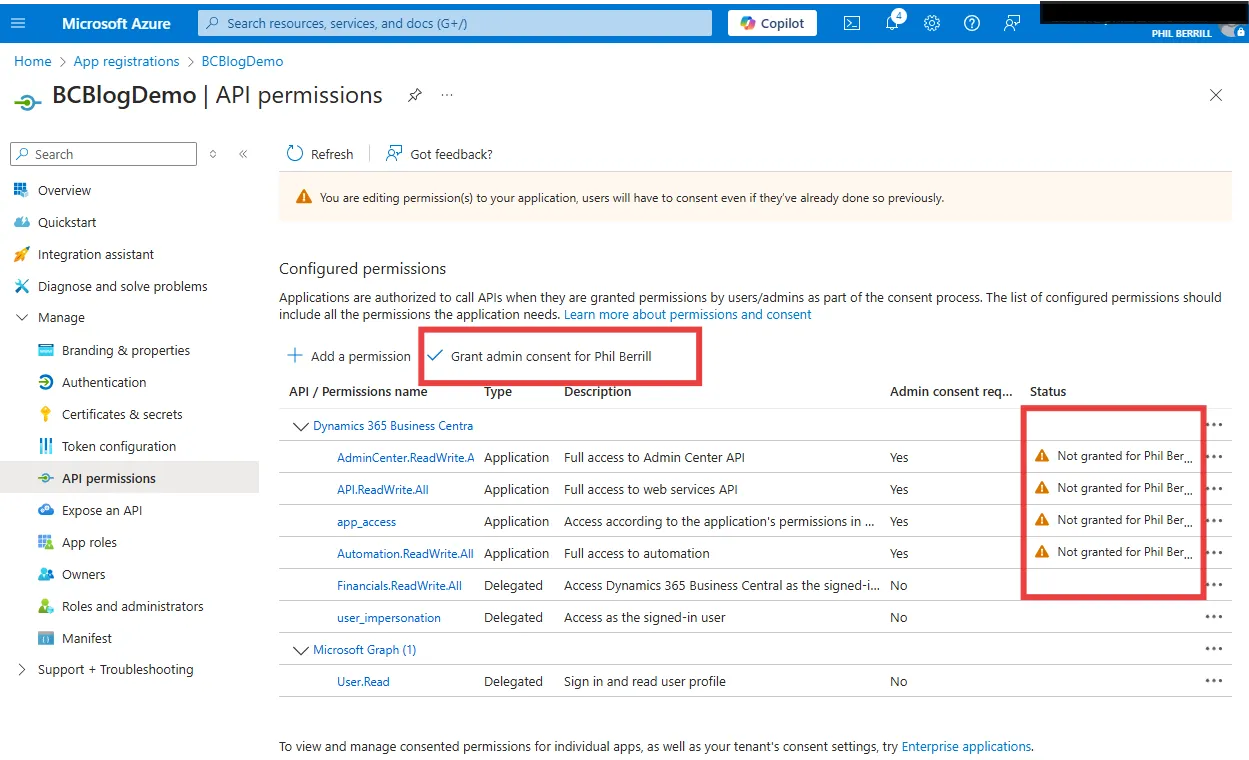
- Select Yes, then confirm the status is granted.
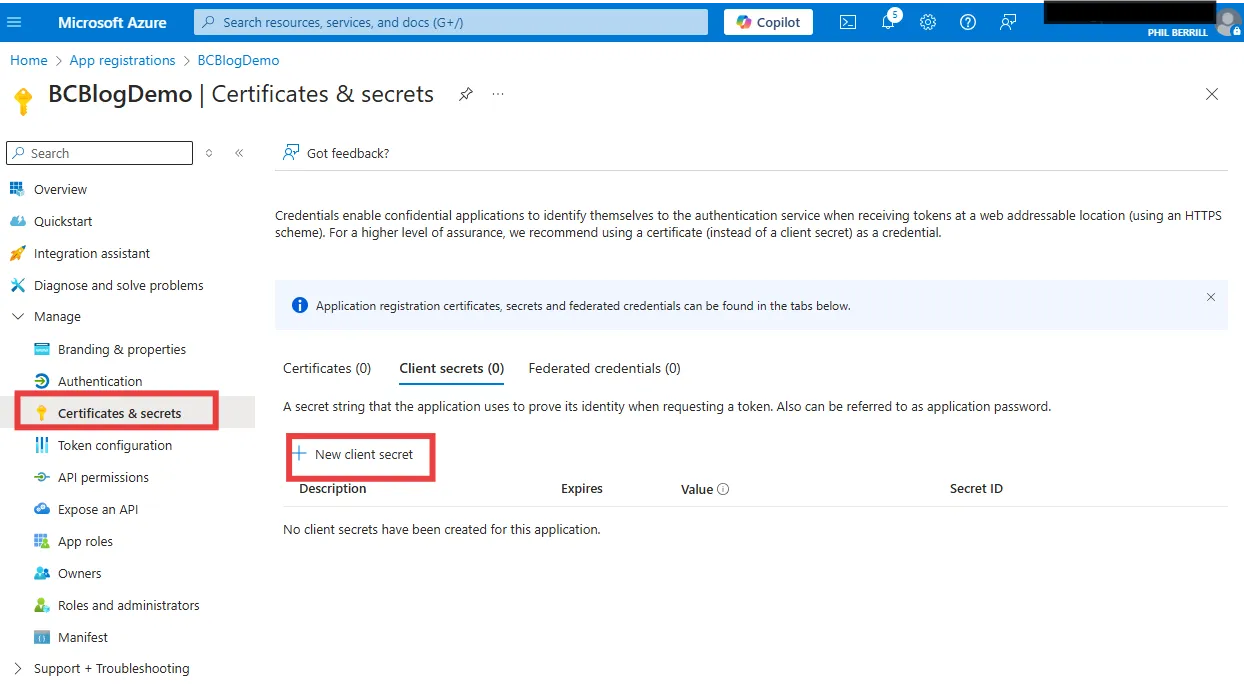
- Add a client secret for S2S access, o to Certificates & Secrets then click New Secret.
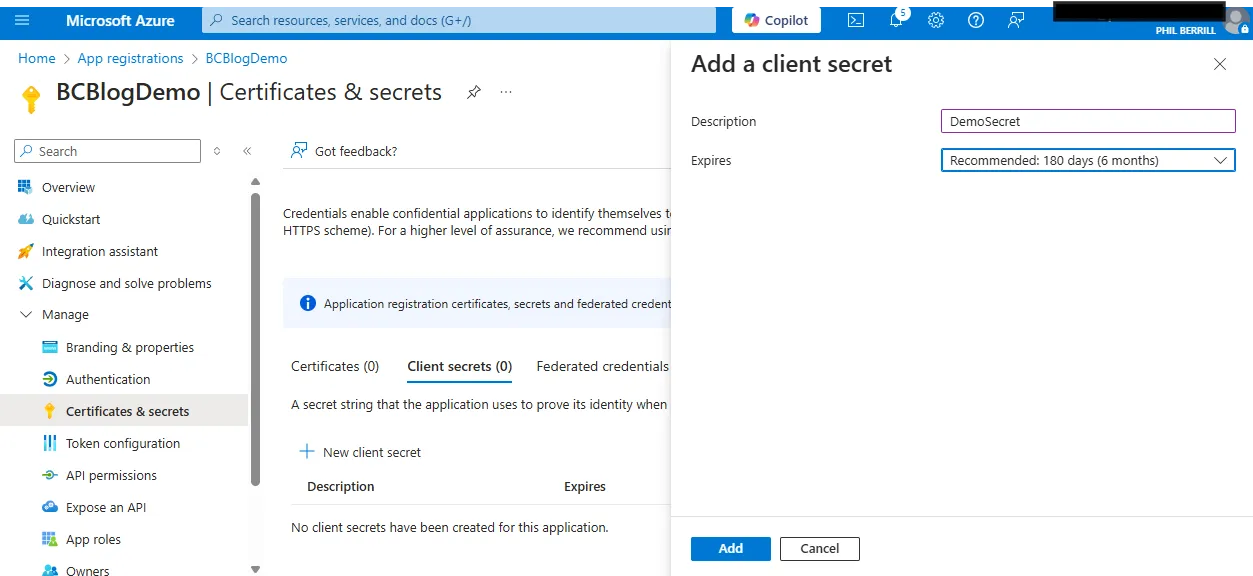
- Give the secret a name and set an expiration duration. Click Add.
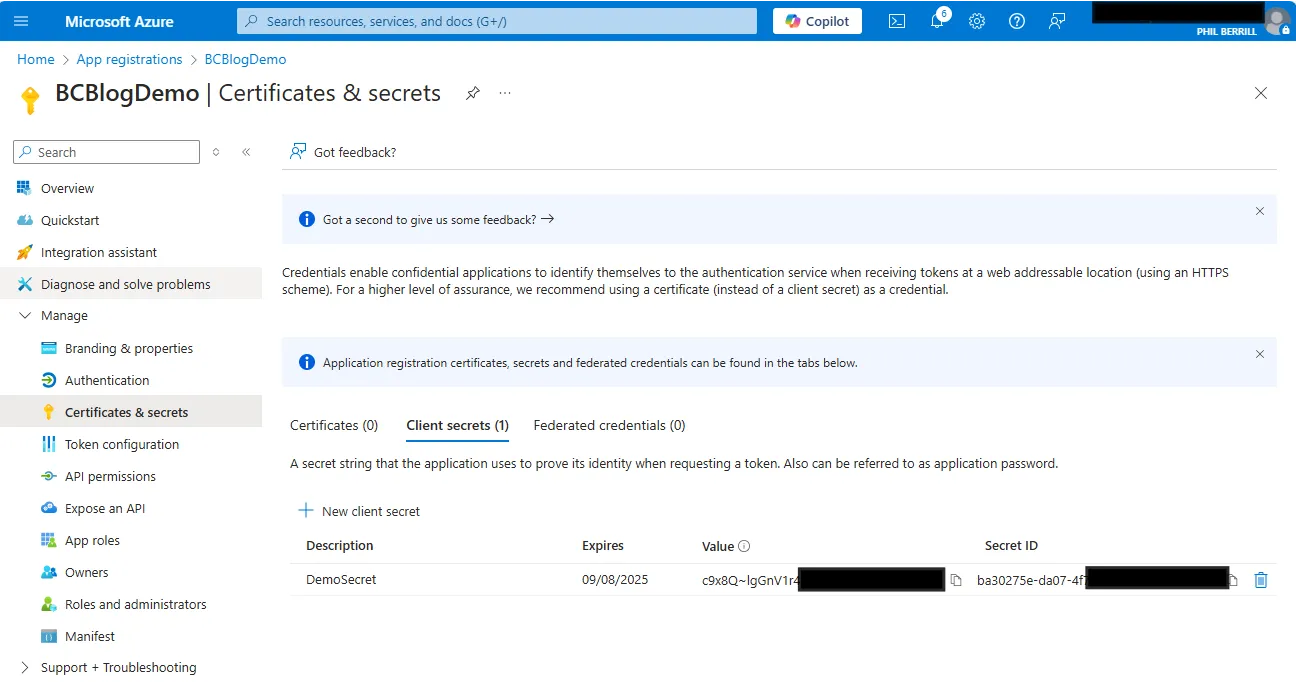
- This will generate a secret (the Value column). This is the only time you will be able to view this so make a note of it, securely.
- The three pieces of information you generally need are
- Application (client) ID – Found on the app registration overview page.
- Client Secret – Obtained in the previous step.
- Directory (tenant) ID – Found on the app registration overview page.
CAUTION
Important: If a client secret is compromised, remove it immediately and generate a new one.
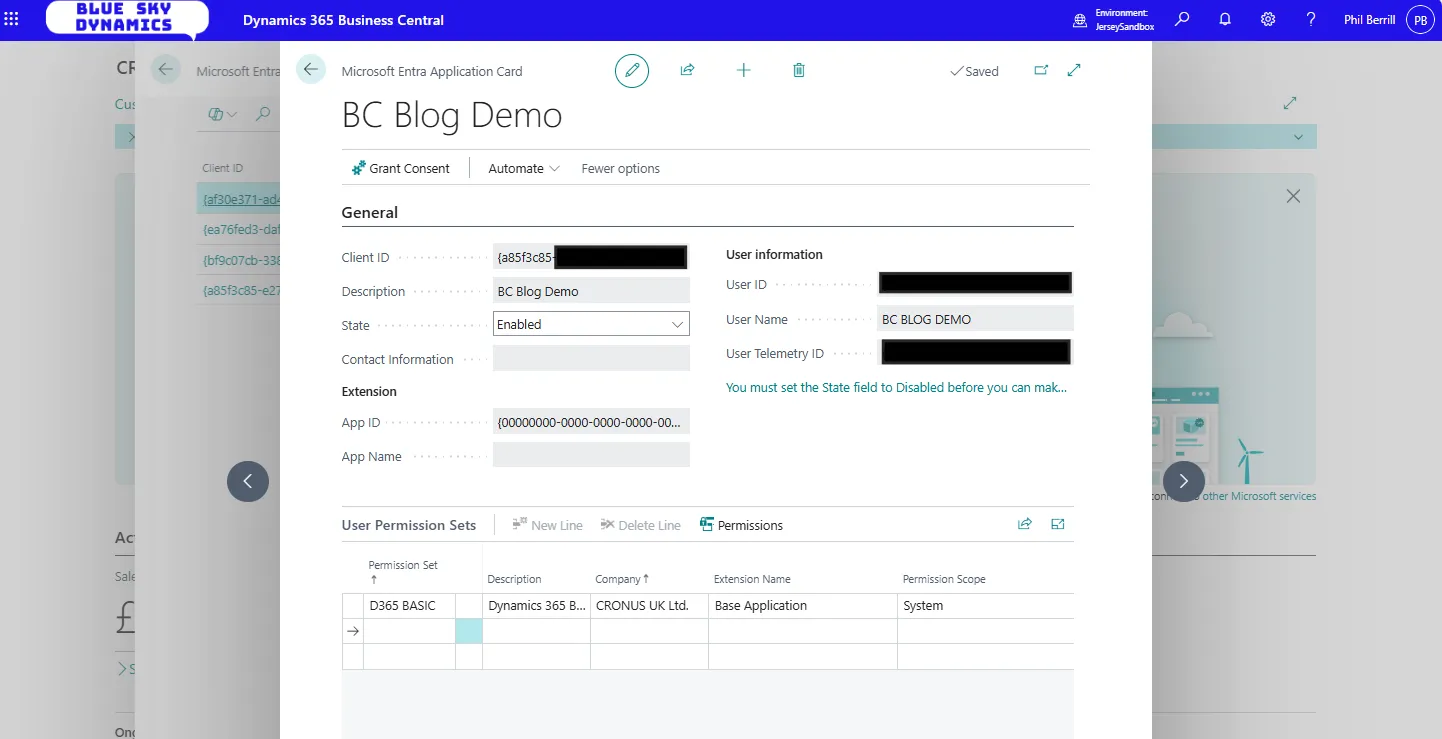
Configuring the Entra App in Business Central
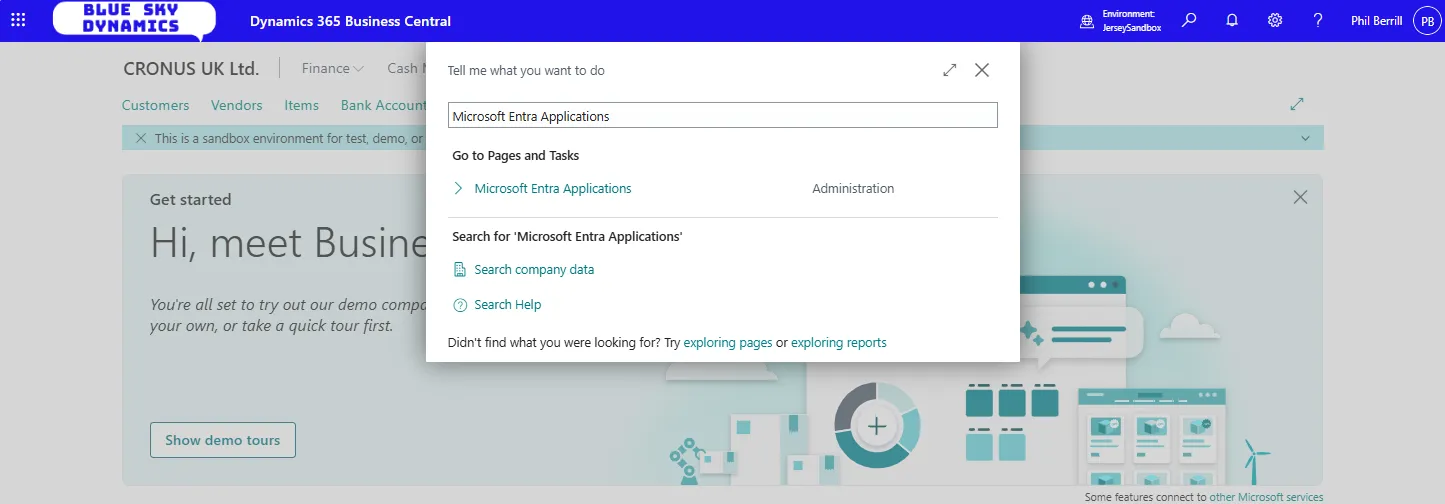
- Navigate to Microsoft Entra Applications.
- Create a new Entra Application.
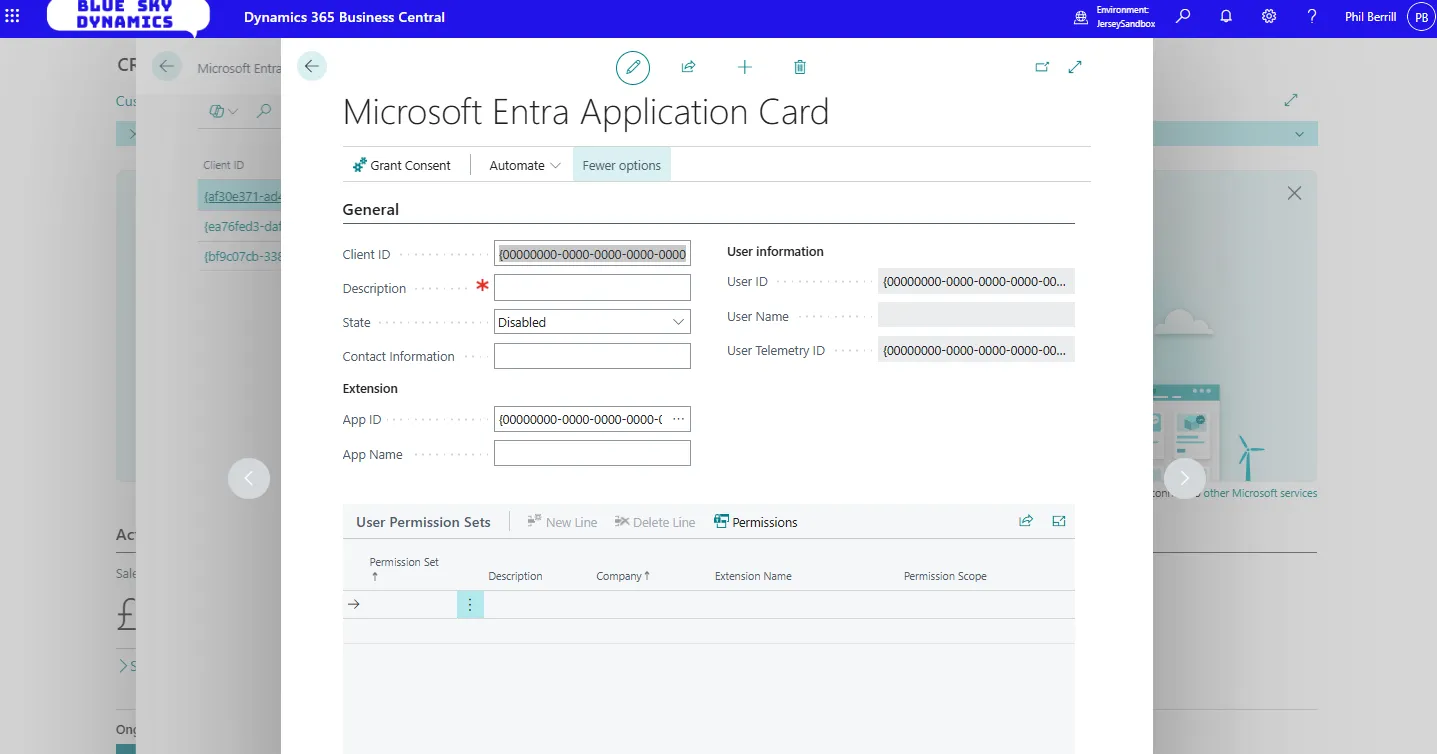
- Add the client ID from the Entra App and Grant Consent.

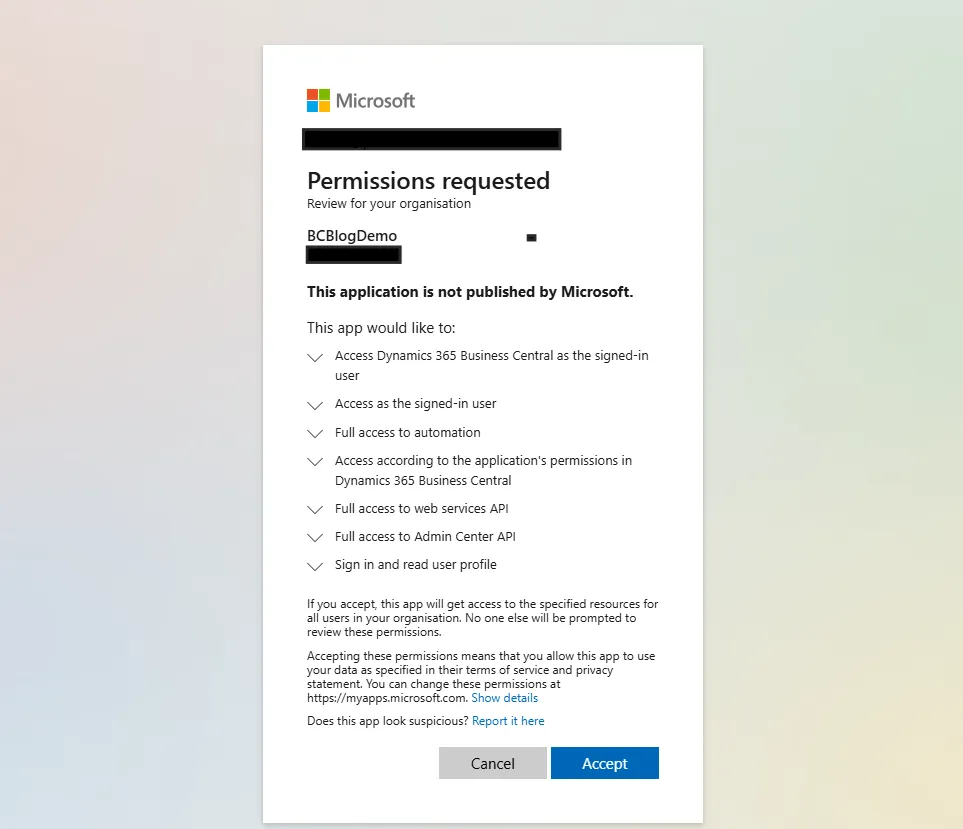
- Sign in as an admin and accept the requested permissions.
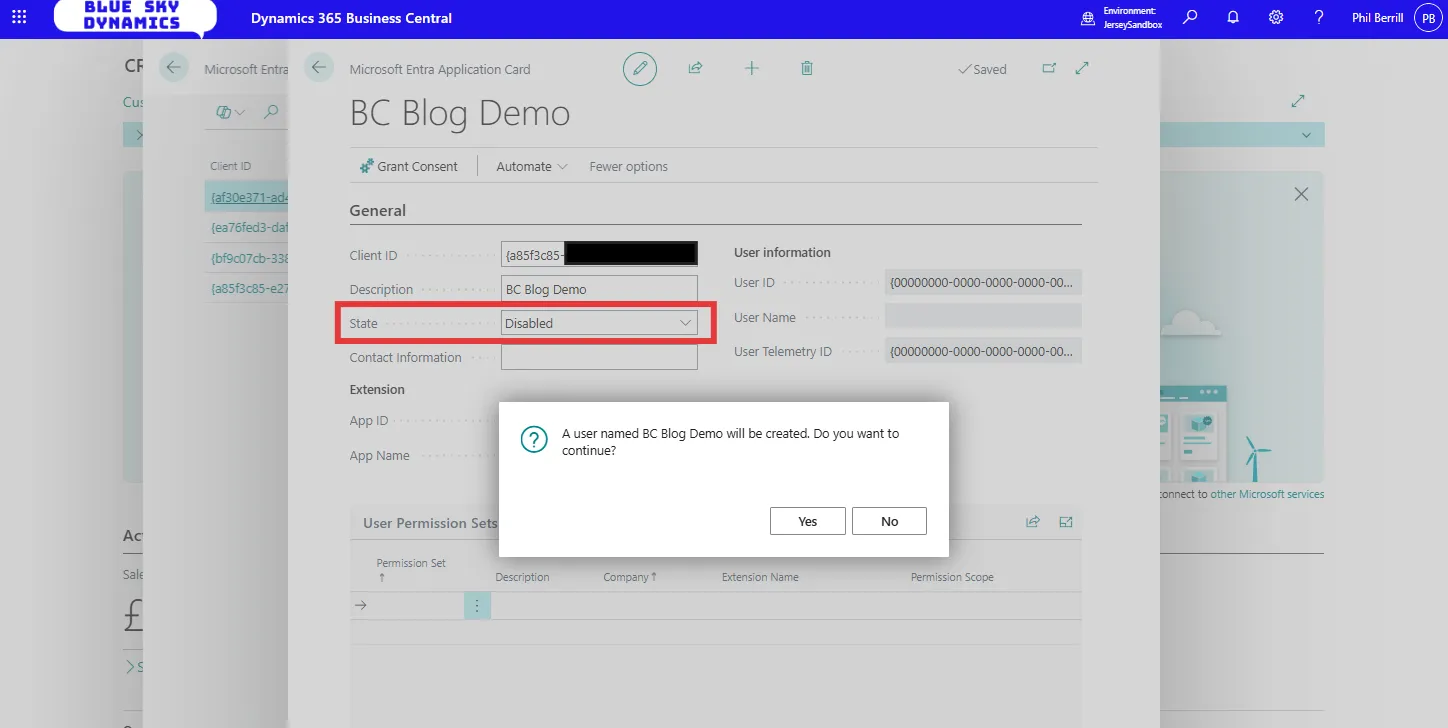
- Change the state to Enabled. A prompt will ask if you want to create a user with the app’s name. Select Yes to continue.
- Assign permission sets to the S2S user as required.
- Note: It is not possible to assign SUPER permissions to an S2S user in Business Central.
That’s it! Now configure the third-party application with the client secret or, if testing APIs, configure Postman.